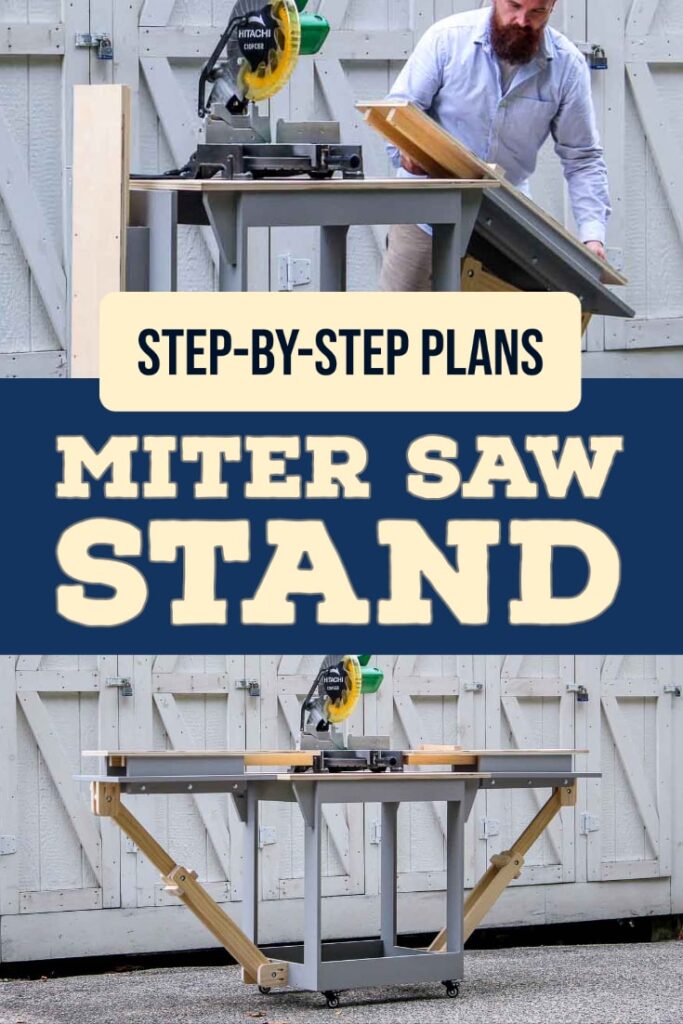
DIY Mobile Miter Saw Stand (Plans & Video)
Make the most of your workshop space with this clever DIY miter saw stand. It folds and rolls, and it’s easy to build with these free step-by-step plans.
If you’re looking for a solution to make your miter saw mobile and save on workshop space, look no further than this DIY miter saw stand. The folding design can be set up or taken down in just a few seconds, and it fits most popular miter saws. It may look complex, but it’s easy to make with just a few simple tools.
So what are you waiting for? Grab the free step-by-step plan, which includes all of the measurements, easy-to-follow instructions, and detailed diagrams, and get started now!
This tutorial contains affiliate links to supplies and tools. Purchases made using these links help support the Saws on Skates website and allows me to share more projects and tips with you. There is no cost to you for using these links. Visit my site policies for more information.
Table of Contents
What is a Mobile Miter Saw Stand?
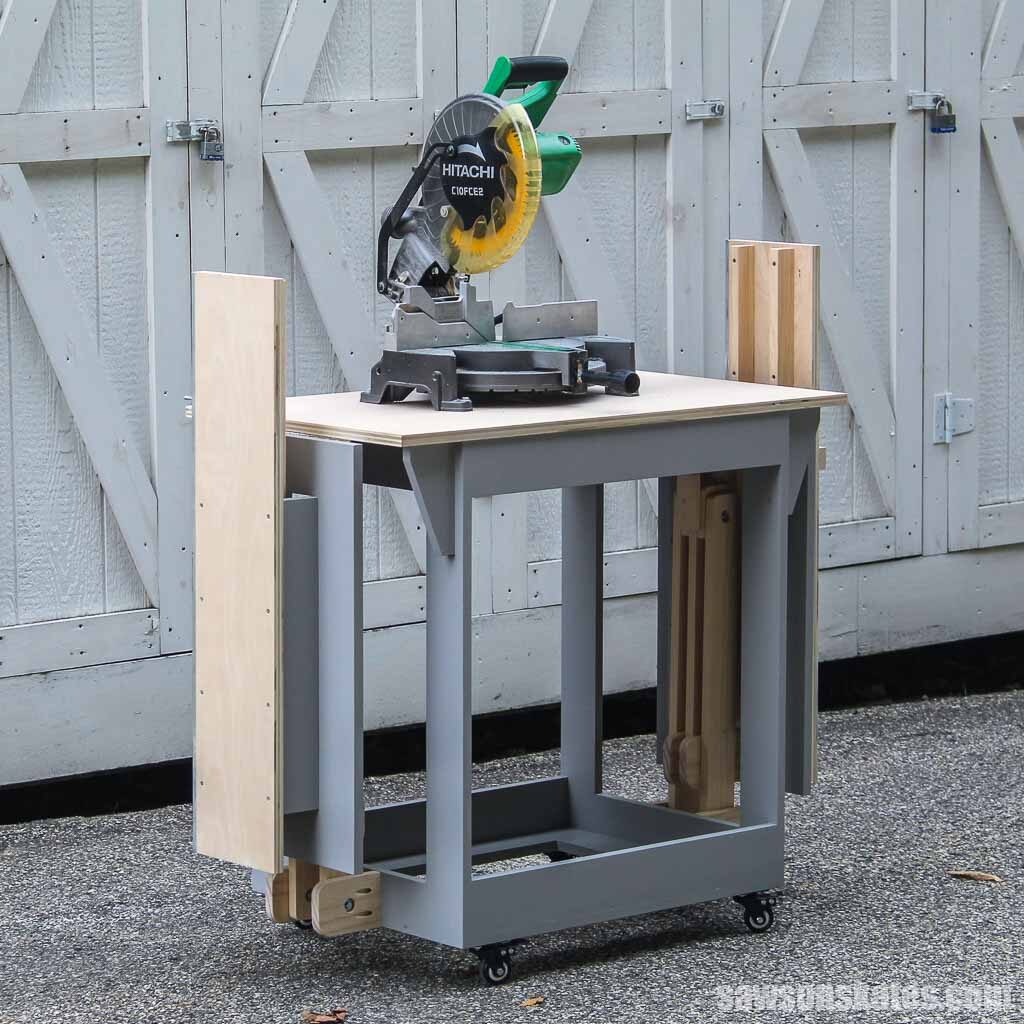
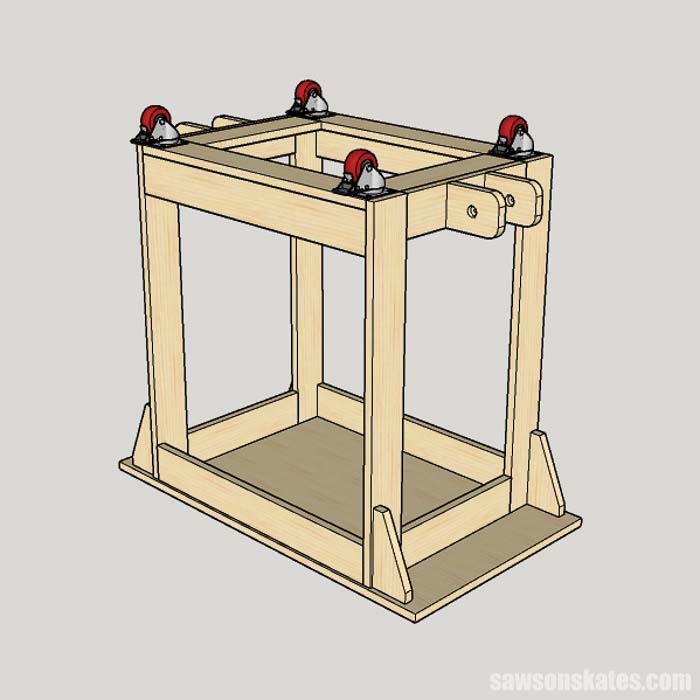
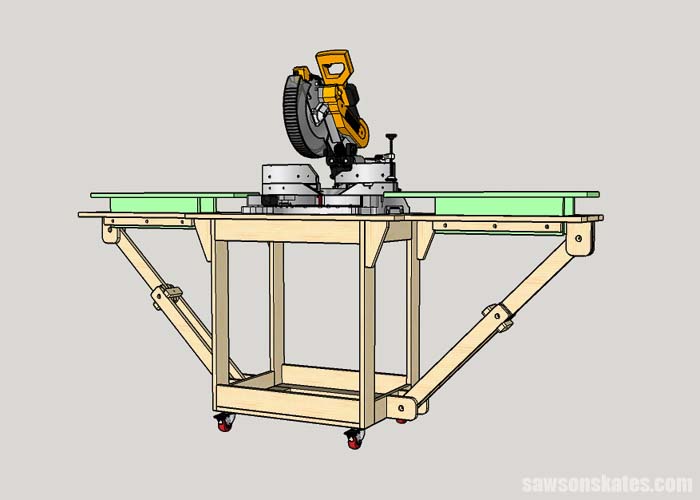
This mobile miter saw stand is loaded with smart features to save space, time, and improve your accuracy.
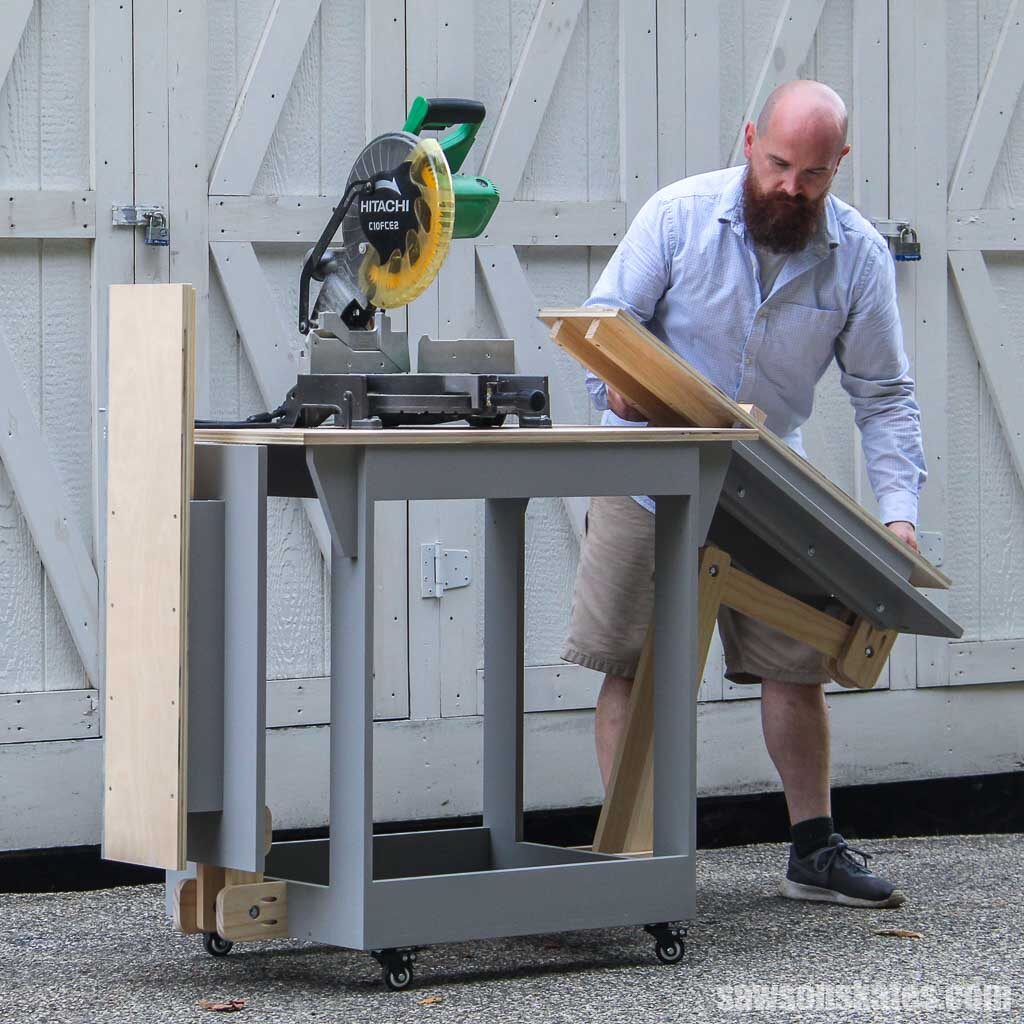
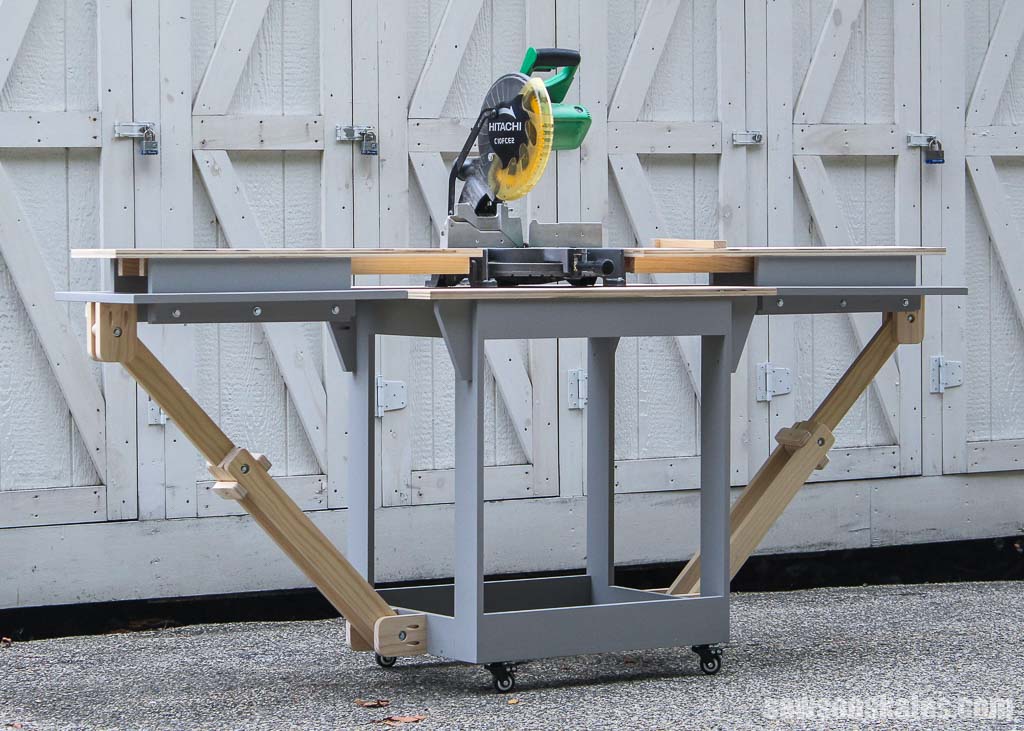
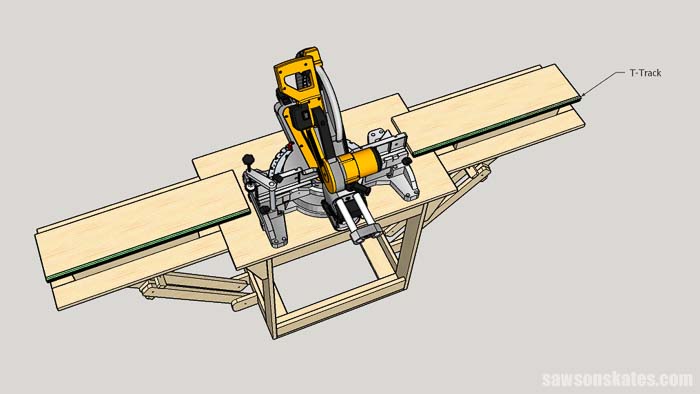
The collapsible support wings increase the size of your miter saw’s small footprint to nearly 91 inches, providing you with plenty of space when it’s time to tackle a big job. The wings also fold for storage, making it ideal for any small workshop, garage, or shed.
Four casters mounted at the bottom allow you to pull the miter saw cart out when it’s time to work and push it back when you’re done.
My buddy told me the folding arms of this miter saw station reminds him of a robot. So I’m nicknaming this project the “Miter-Bot”!
📝 NOTE: The arms could be a pinch point. Please use caution when folding the support wings.
The folding support wings also have a stop for repeatable cuts. Using the stop saves time and improves the accuracy of your DIY projects.
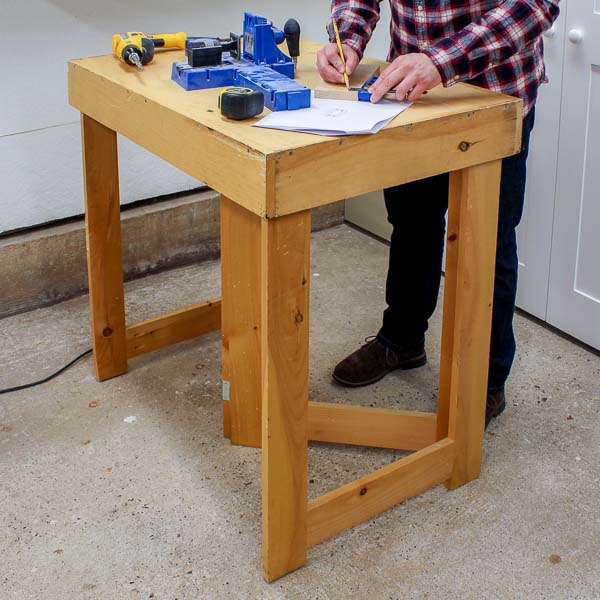
What Tools Do You Need?
I wanted to make sure that everyone, from beginners to advanced DIYers, could build this stand with only a few basic woodworking tools. You’ll see in the video that I used a few tools to simplify the process. In many situations, you may use another type of tool or simply skip that step.
For example, in Step 9, I rounded the corners to give the arm anchors a finished look. I used a disc sander to round the corners, but I understand not every DIYer has one. I think these pieces are too small to cut with a jigsaw, but you could use a palm sander to round the corners instead. Or you could just leave the corners square.
Nearly all of the cuts for this project can be made with a miter saw. The exception is the plywood top, which will need to be cut with either a circular saw or a table saw.
Related: 4 Ways to Make Straight Cuts with a Circular Saw
The parts of this mobile stand were joined with pocket hole joinery. You may use any pocket hole jig that you have. I used my Kreg Jig K5, which was discontinued since I built this project.
Related: Which Kreg Jig Should You Buy?
What Wood Should You Use?
As I mentioned earlier, I wanted this project to be easy to build for DIYers of all skill levels. I also wanted it to be easy to make for DIYers with a small workshop.
Related: My 12×13 Small Woodshop Layout
Plywood is often a popular material for building DIY miter saw stands, but working with plywood has some drawbacks. For example, it can be tough to maneuver plywood sheets in a small workshop.
If you have a small car, it might be challenging to transport the plywood back to your shop. Many big box home improvement stores provide free wood cutting; however, the cuts are frequently not precise.
Instead of plywood, this mobile miter saw stand was made almost entirely with 1×4 lumber and only two small sheets of plywood. In my experience, it’s easier for do-it-yourselfers with small shops to work with these materials.
Another note about the wood. I planned to paint the base of the stand to give it a store-bought appearance. So, rather than using raw wood, I tried something new and used pre-primed lumber.
I figured using pre-primed lumber would save time and steps because the sanding and priming were already done. It was a good idea, but it didn’t work out that way.
The primer was rough and bumpy in some areas, and I had to sand to make it smooth. Also, when I got the boards home, I noticed that they were made in two different countries and that the edges were finished differently. Some of the boards had square edges, while others had rounded edges similar to a 2×4. To my eye, attaching square edges to rounded edges would have made this piece look unprofessional.
The most significant thing I noticed was that the wood itself seemed weaker than the pine that I usually buy for my projects. While driving screws, some of the pieces split, while others simply broke in half. I doubt I’ll use primed wood again to build a project like this.
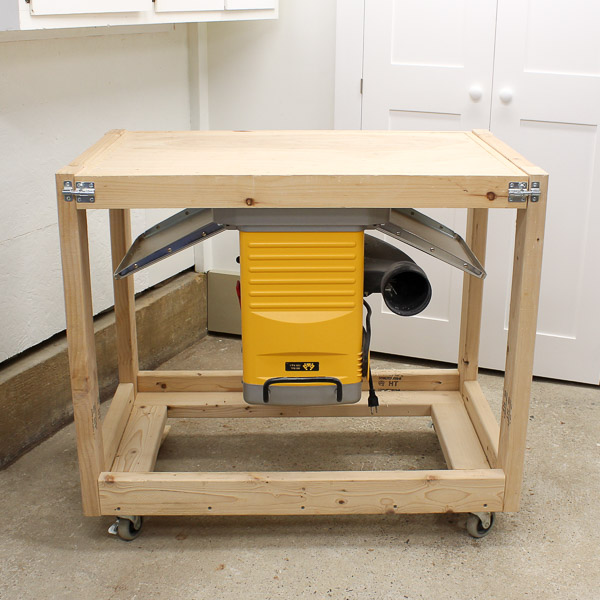
Miter Saw Dust Collection
A miter saw is a useful tool, but it produces a lot of sawdust. One way to control the dust is with a miter saw dust hood.
A miter saw hood is a simple device that sits behind a miter saw and captures most of the dust. The hood connects to a shop vacuum or dust collection system and prevents the dust from spreading throughout the workshop, making your workspace quicker and easier to clean.
I made this dust hood behind the miter saw in my workshop. In the bottom of the hood is a 4″ fitting that connects to my dust collector with a flexible hose.
Related: How to Make a DIY Miter Saw Dust Hood
How to Make a DIY Miter Saw Stand: Video
How to Make a DIY Miter Saw Stand
Printed Plan
- Get the FREE plan here (includes detailed instructions, measurements, and bonus tips).
Supplies
- Wood (per the printed plan)
- 1-¼” Pocket Screws
- ¾” Wood Screws
- 1-¼” Wood Screws
- 1-½” Wood Screws
- 2” Wood Screws
- (2) ¼”×3-½” Lag Bolts
- (2) ¼”×2” Lag Bolts
- (5) ¼”×1-¼” Lag Bolts
- (12) 1-½” Lag Screws
- (56) ¼” Washers
- (8) ¼” Lock Nuts
- (1) ¼” Wing Nut
- (2) 12” Piano Hinges
- (4) 2” Casters
- T-Track
Tools
- Tape Measure
- Drill
- Miter Saw
- Compass
- Circular Saw (it’s helpful to have a Kreg Rip-Cut or Kreg Accu-Cut)
- Table Saw (optional)
- Countersink Drill Bit Set
- Forstner Bits (¼”, ½” and ⅞”)
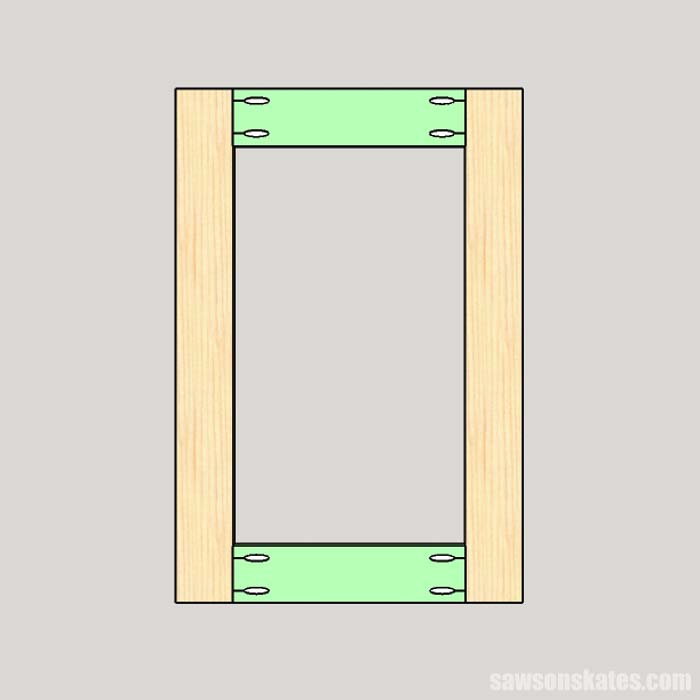
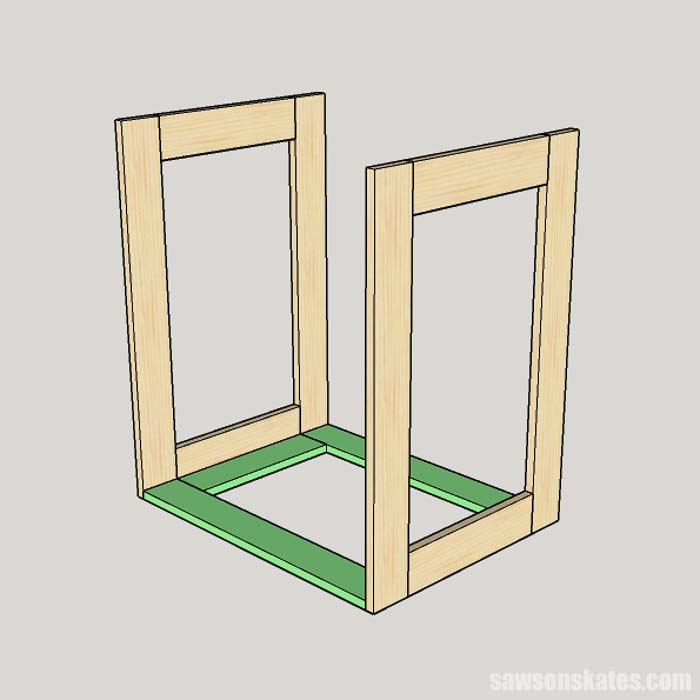
Step 1. Make the Sides
Cut 4 pieces of 1×4 for the stiles. Cut 6 pieces of 1×4 for the rails and drill pocket holes in each end. 4 of these pieces will be used in this step and 2 pieces will be used in Step 2.
Related: How to Use a Kreg Jig
Apply glue to the ends of 2 rails, position on 2 stiles and clamp. Attach using pocket screws. Repeat for the other side.
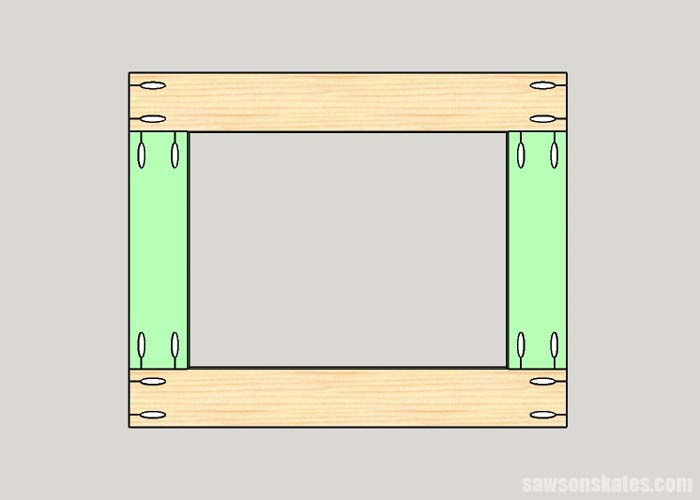
Step 2. Make the Bottom
Cut 6 pieces of 1×4 and drill pocket holes in each end. 2 of these pieces will be used in this step and 4 pieces will be used in Step 4.
Apply glue to the ends of the pieces from Step 1, position on 2 of the pieces from this step and clamp. Attach using pocket screws.
Step 3. Attach the Bottom
Apply glue to the edges of the bottom and clamp to the sides. Attach using pocket screws. Also, drill several countersink holes in the bottom rails of the sides and attach using wood screws.
Related: How to Use a Countersink Bit
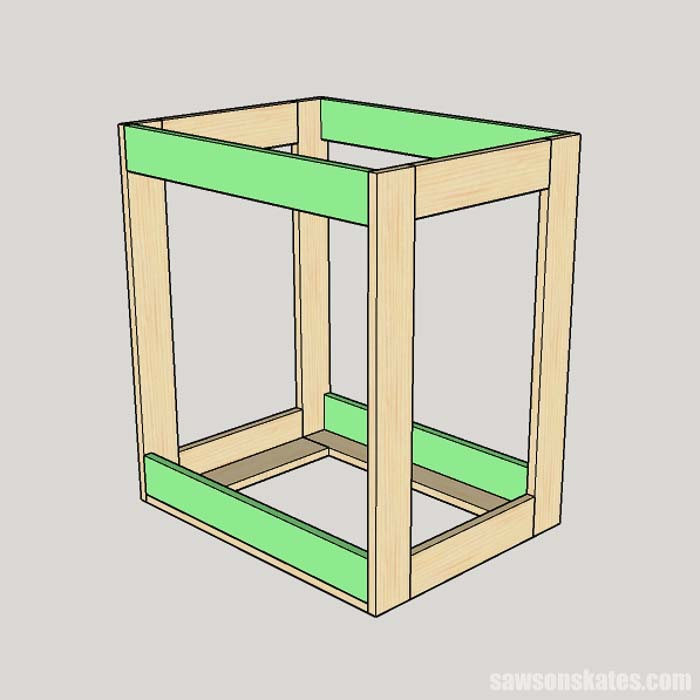
Step 4. Attach the Rails
Apply glue to the rails (from Step 2), position on the sides and clamp. Attach using pocket screws.
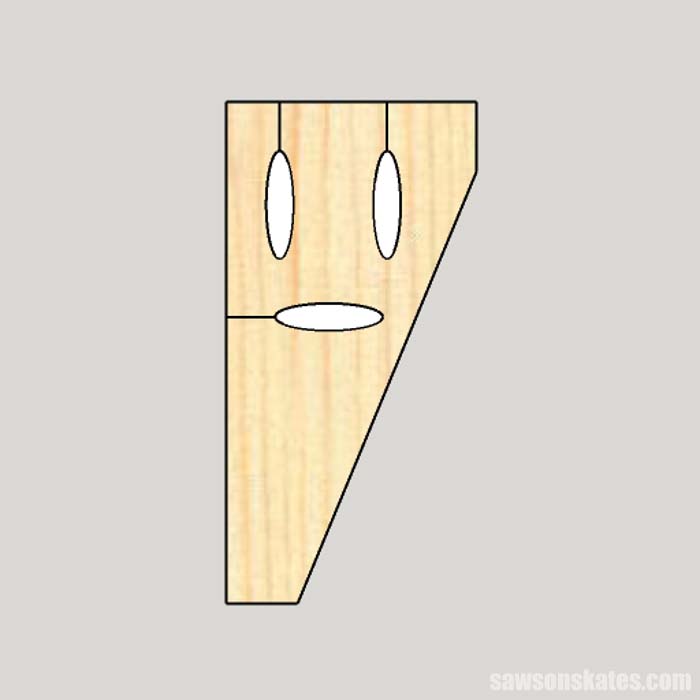
Step 5. Make the Top Supports
Cut 4 pieces of 1×4. Measure in at the top and bottom. Connect the marks and cut an angle with a DIY circular saw crosscut guide. Then drill pocket holes in each support. Be sure to make 2 right supports and 2 left supports. This way the pocket holes will face inward rather than outward.
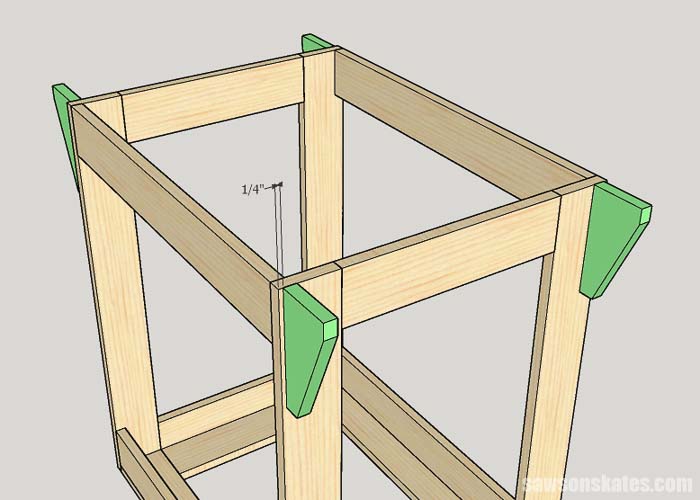
Attach the top supports to the base with wood screws and pocket screws.
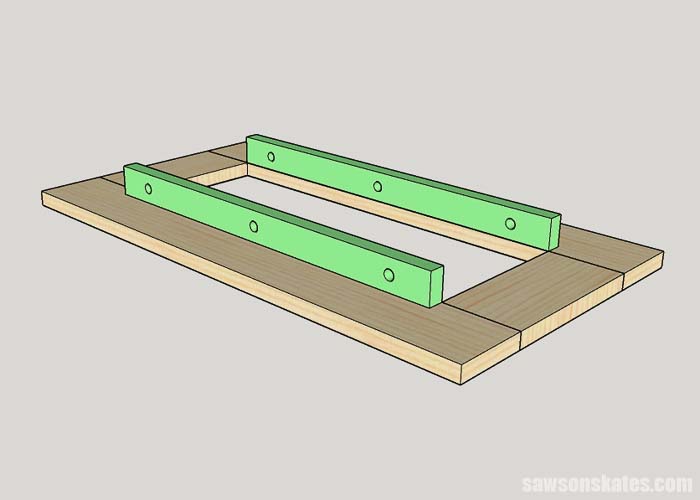
Step 6. Make the Wing Frames
Cut 4 long pieces of 1×4. Cut 4 short pieces of 1×4 and drill pocket holes in each end. Apply glue to the ends of 2 short pieces, position on the long pieces and clamp. Attach using pocket screws. Repeat for the other frame.
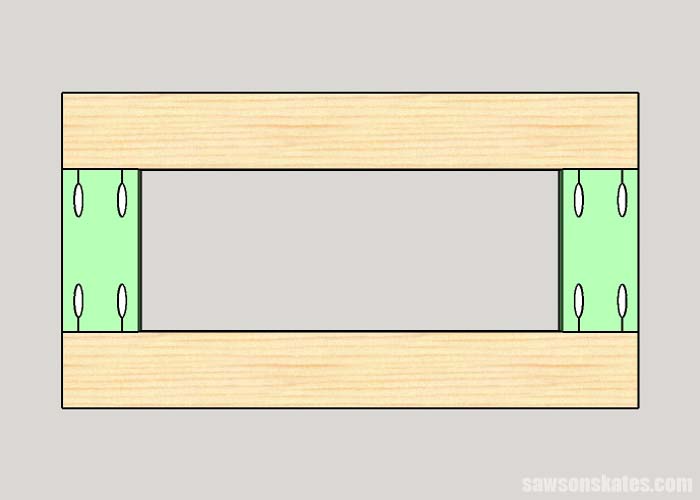
Cut 4 pieces of 1×2. Drill several countersink holes on the edge of each piece. Also, drill 3 holes in the side of each piece.
Apply glue to the edge, position on the inside of the wing frame and clamp. Attach using wood screws. Repeat for the other pieces.
Step 7. Paint (Optional)
I painted the base and wings of the miter saw cart because I wanted it to look like a store-bought piece of workshop furniture. I lightly sanded all of the parts and sprayed a coat of primer. When the primer was dry I sprayed the stand with two coats of “Casual Gray” Behr High Gloss paint.
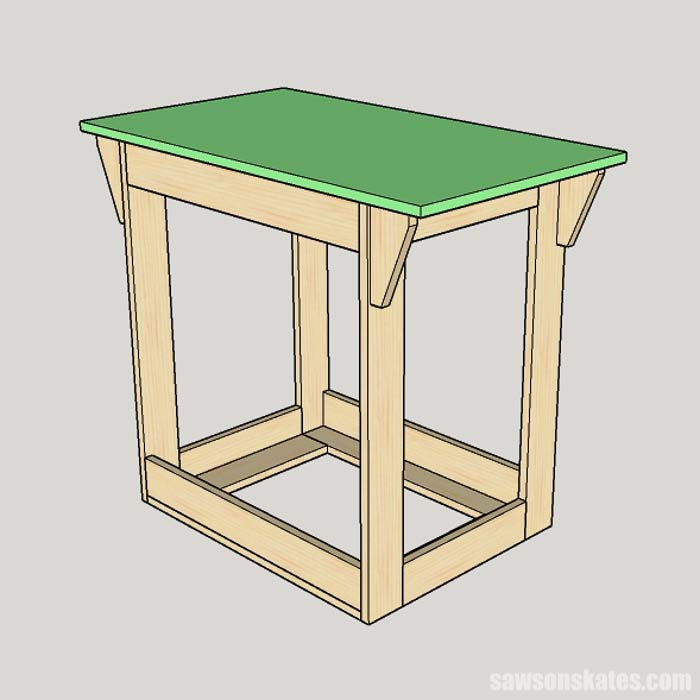
Step 8. Make the Top
Cut a ¾” piece of plywood. Position the top on the stand and clamp. Attach the top supports using pocket screws.
Related: 4 Ways to Make Straight Cuts with a Circular Saw
Measure in on the front and back and drill several countersink holes. Attach using wood screws.
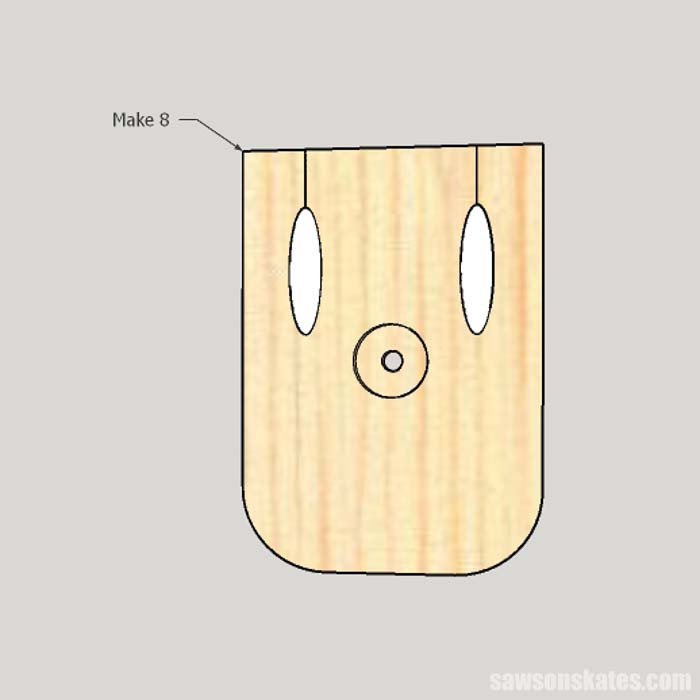
Step 9. Make the Arm Anchors
Cut 8 pieces of 1×4. Measure in on each corner and use a compass to draw an arc. I used a disc sander to round off the corners.
Next, I used a ⅞” Forstner bit and a ¼” Forstner bit to drill holes that will connect the anchors to the arms.
Step 10. Make the Lower Arms
Cut 4 pieces of 1×3. Measure in on each corner and use a compass to draw an arc. I used a disc sander to round off the corners.
Next, I used a ⅞” Forstner bit and a ¼” Forstner bit to drill holes on the opposite side of each arm. The holes will connect the arms to the anchors.
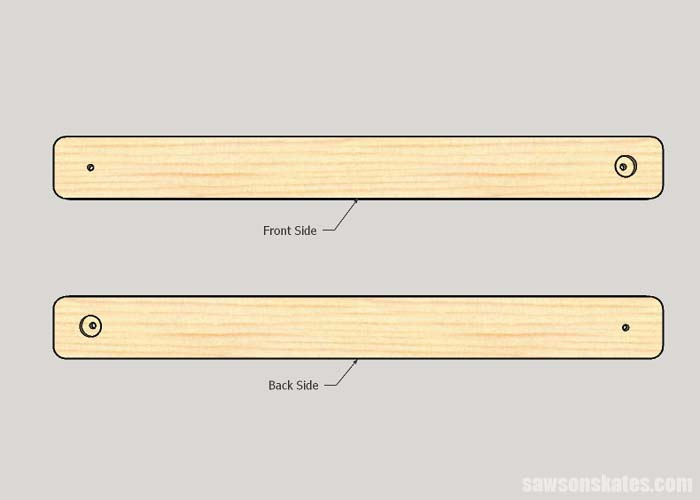
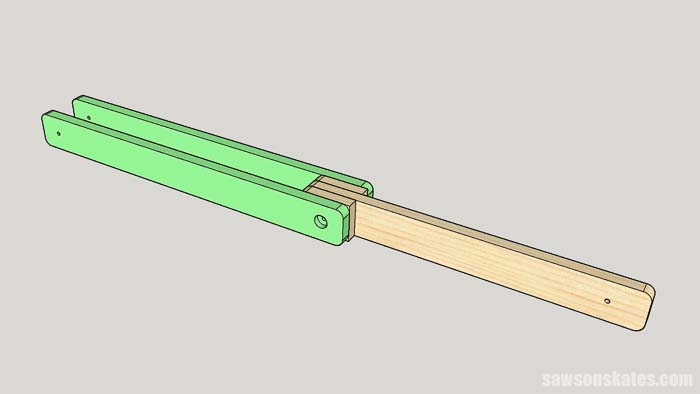
Step 11. Make the Upper Arms
Cut 2 pieces of 1×3. Cut 4 pieces of 1×3. I used a ¼” Forstner bit to drill through the end of each piece.
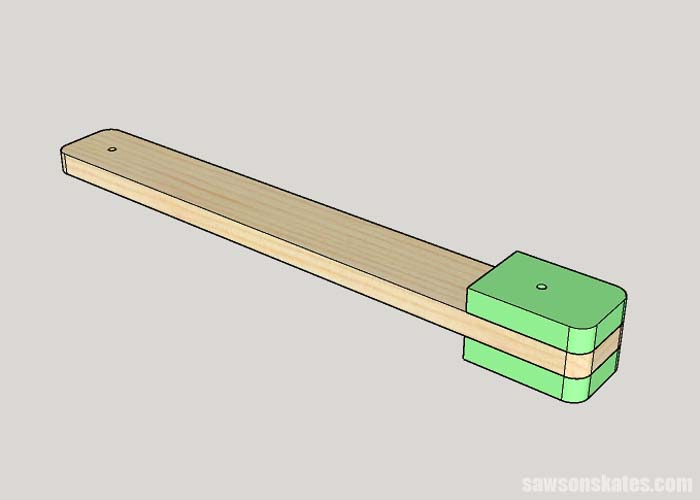
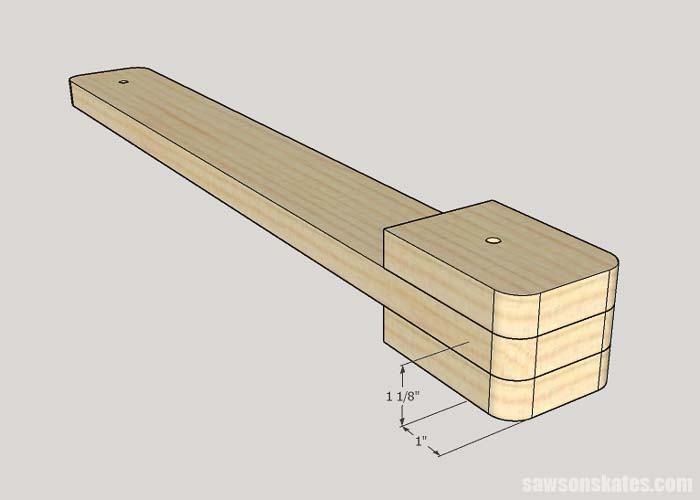
Apply glue to 2 small pieces, position on the end of an arm (I used a spare bolt to align the holes) and clamp. Repeat for the other arm.
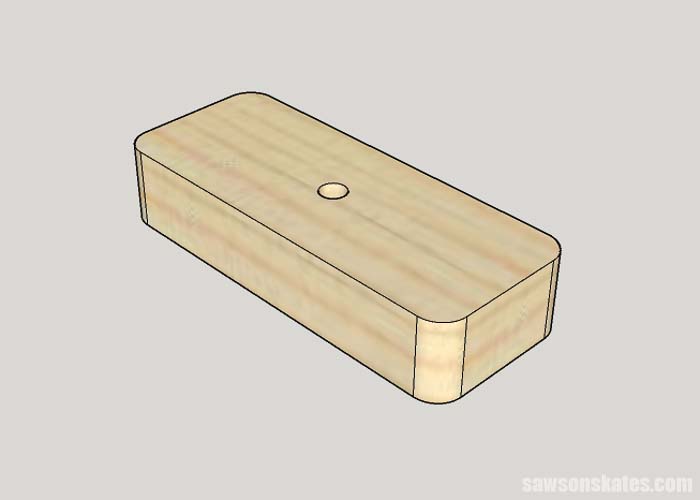
When the glue is dry measure in on each corner and use a compass to draw an arc. I used a disc sander to round off the corners.
Next, I marked the location for the arm locks on the top and bottom side of the arm. I’ll use these marks to attach the arm locks in Step 13.
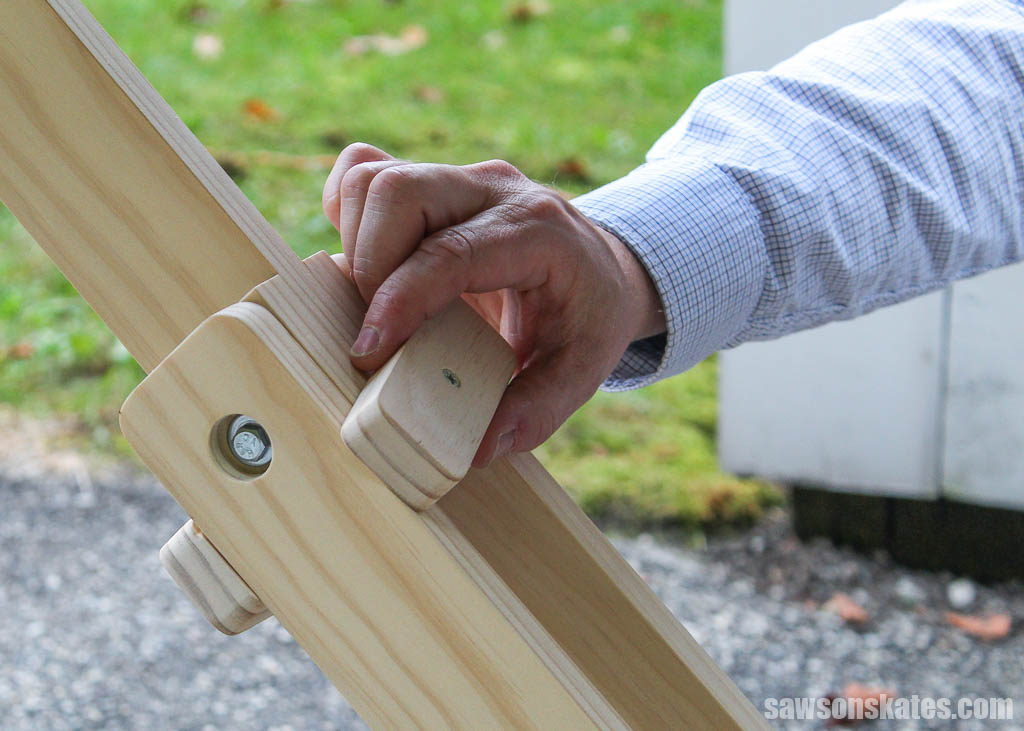
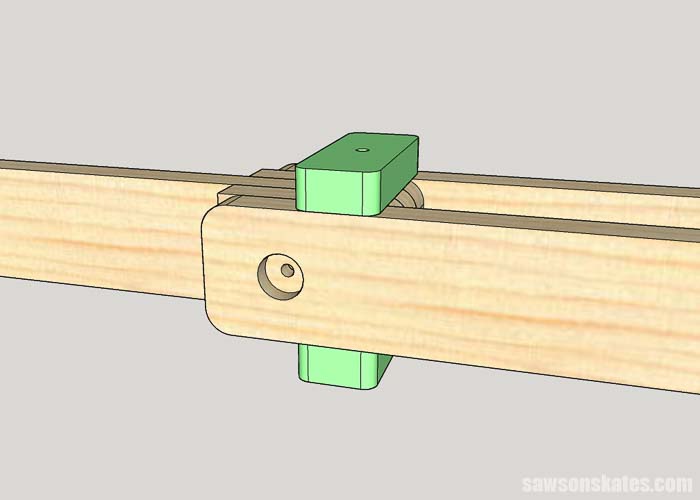
Step 12. Make the Arm Locks
Cut 4 pieces of 1×2. The locks will be held in place with screws. First I drilled countersink holes in the center of each piece. Then I drilled a hole inside the countersink hole. This will allow the lock to spin freely on the screw. Measure in on each corner and use a compass to draw an arc. I used a disc sander to round off the corners.
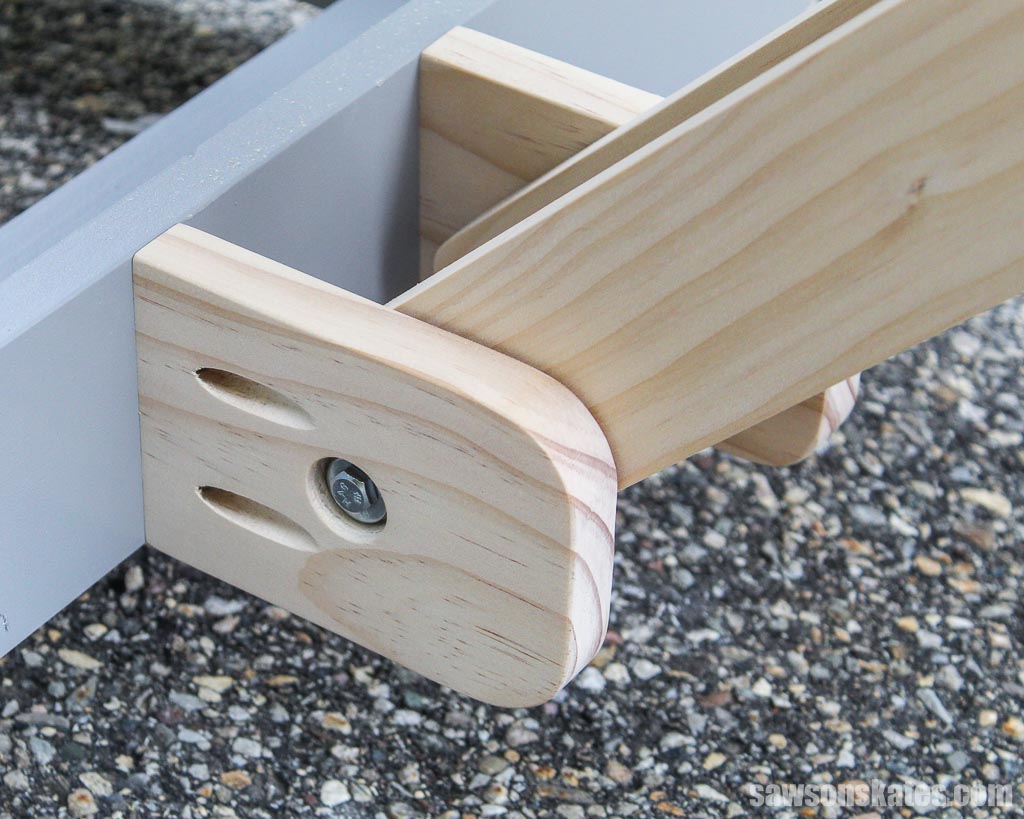
Step 13. Assemble the Arms
Layout 2 lower arms and 1 upper arm. Insert a bolt with a washer into the middle hole in the arms. Then place a washer on both sides of the upper arm. Attach using another washer and a lock nut. Tighten the nut but leave it loose enough so the arms can move freely. Repeat for the other set of arms.
Attach 2 anchors to the upper arm. Insert a bolt with a washer into the upper arm hole and attach using another washer and a lock nut. Tighten the nut but leave it loose enough so the arms can move freely. Repeat for the other set of arms.
Attach 1 anchor to each lower arm. Insert a bolt with a washer (I needed to use three washers to prevent the nut from protruding beyond the back of the assembly) into the lower arm hole and attach using another washer and a lock nut. Tighten the nut but leave it loose enough so the arms can move freely. Repeat for the remaining anchors.
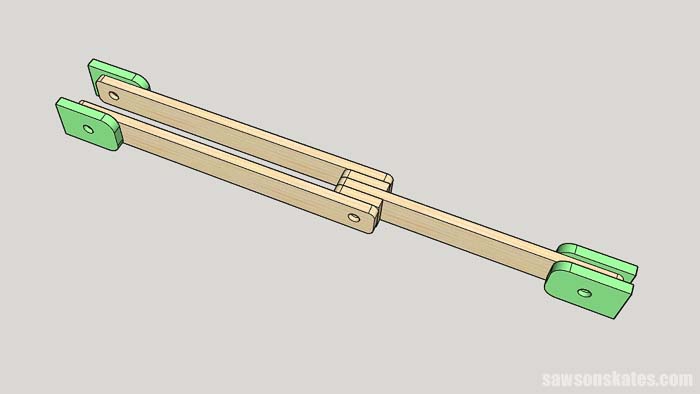
Attach the arm locks using wood screws.
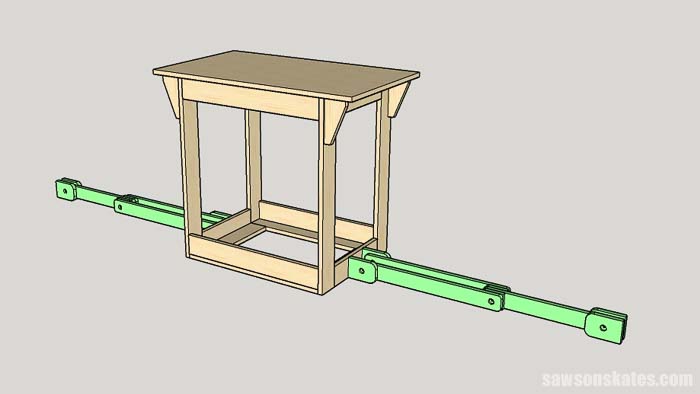
Step 14. Attach the Lower Anchors
Position an arm assembly on the base and flip the upper arms in between the lower arms. I inserted a few playing cards in between the upper arms and lower arms to act as spacers. This will ensure the arms will move freely later on.
Center the assembly on the base and clamp in position. Attach the anchors using pocket screws.
Next, I temporarily removed the arms. I need to flip the base in the next step and this will prevent the arms from flopping around.
Step 15. Attach the Casters
Flip the base and attach one caster to each corner.
Step 16. Attach the Folding Wings
Center a wing on each side of the top. Attach the wing to the top with a 12” piano hinge.
Step 17. Attach the Upper Anchors
Reattach the arms to the lower anchors. Center the upper anchors on the wing and clamp in position. Attach using pocket screws.

I attached 1 piece of 1×2 to the back of the upper anchor with a wood screw. This will help push the arm in the upright position when the wing is closed.

Step 18. Attach the Miter Saw
Center the miter saw from side to side and front to back. Drill holes in the top to match the mounting holes in the miter saw. Attach using bolts, washers, and nuts.

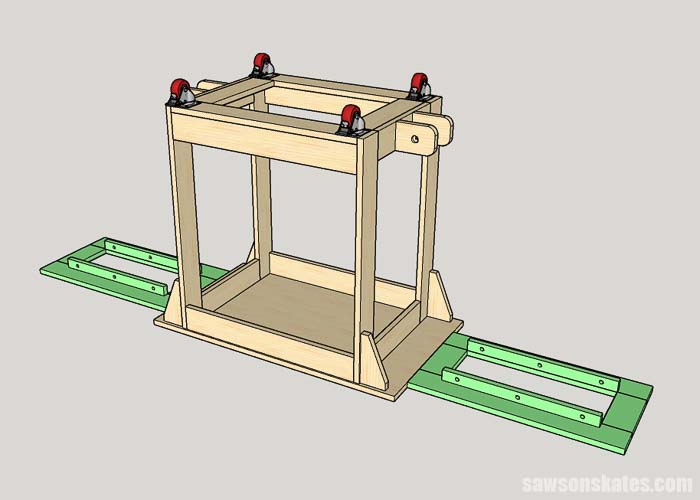
Step 19. Make the Wing Tables
The dimension of each miter saw is a little different. The length of the wing tables is based on the distance from the end of the wing table to the side of the miter saw base. This means the length of the wing tables will be different for each saw.
To determine the length of your wing table raise the wings and measure from the end of the wing to the side of the miter saw. Then, subtract 1″ from this measurement.
Use a circular saw or table saw to rip two pieces of ¾” plywood to 8” and cut to your dimension.
Related: 4 Ways to Make Straight Cuts with a Circular Saw
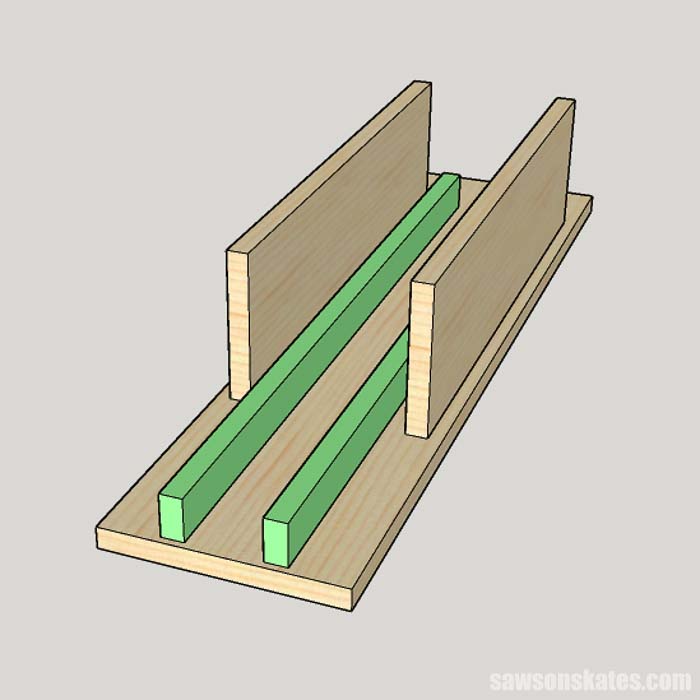
Cut 4 pieces of 1×6. These pieces need to fit inside the wing frames. They should be snug, but not too tight. Otherwise, it will be difficult to install the wing tables in the wing frames. Adjust to fit if necessary.
Position 2 pieces from the end of the wing tabletop and set in from each edge. Clamp in position, drill several countersink holes and attach using wood screws.
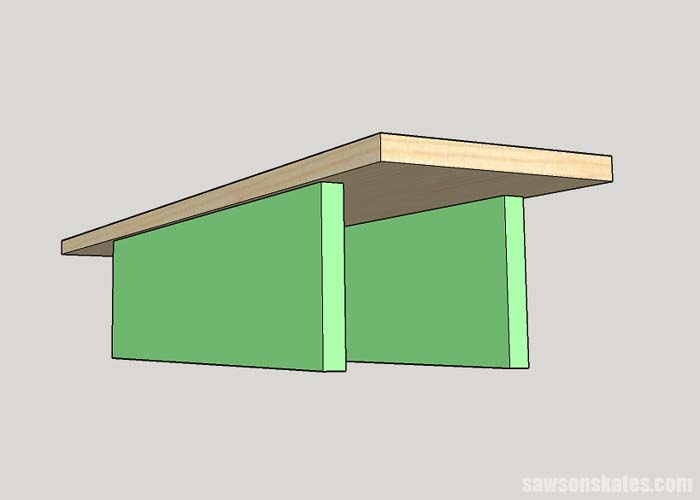
The wing table supports are based on the length of the wing table. Measure from the side of the wing table that will extend over the base of the stand to the outside edge of the 1×6. Then, subtract a ¼” from this measurement.
Cut 4 pieces of 1×2 to your dimension. I placed the supports on the underside of the wing tables. I used some scrap 1x material as spacers between the 1×6s and the 1×2s. Drill several countersink holes in the supports and attach using wood screws.
Step 20. Install the Wing Tables
Insert a wing table into the wing. Place a straight edge (I used a 6′ level) across the miter saw table and adjust the wing until it’s level with the miter saw table. Clamp the wing table to the wing and attach using washers and lag screws. Repeat for the other wing table.
Step 21. Attach the T-Track
Cut 2 pieces of T-Track to match the length of the wing table. Position on the back of the wing table and clamp. Attach using wood screws.
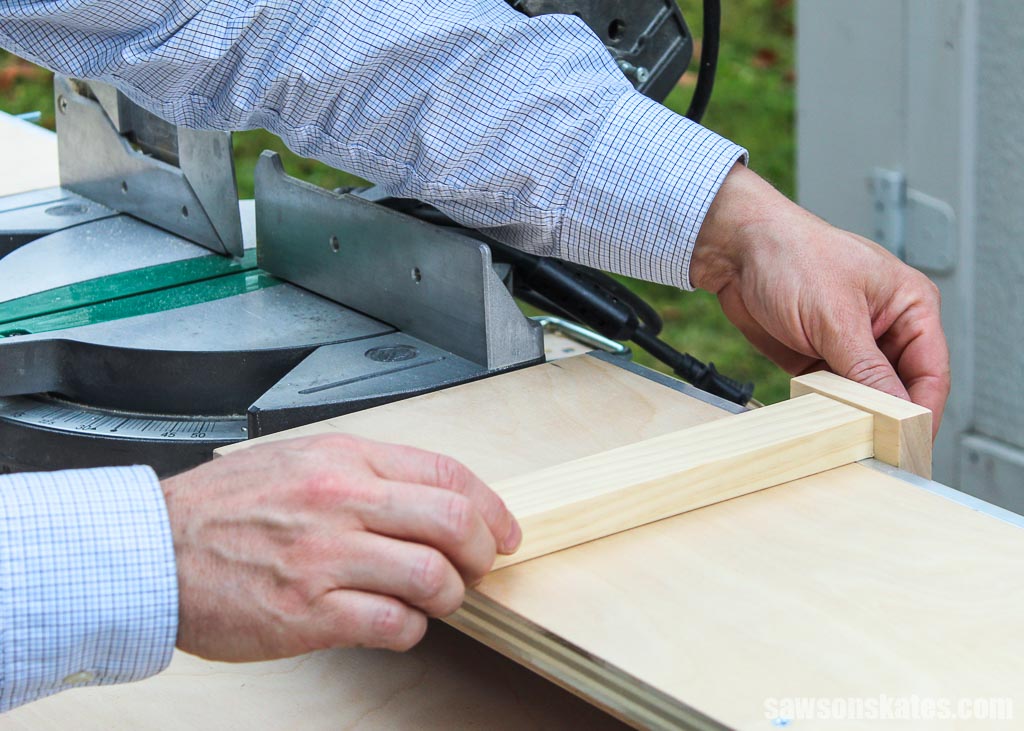
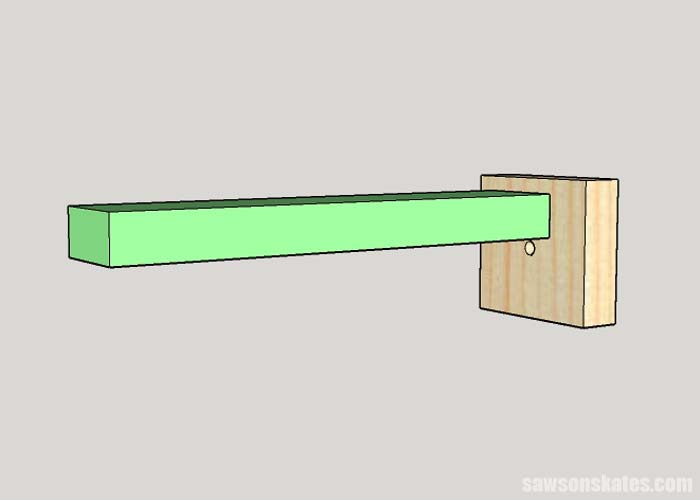
Step 22. Make the Stop
Cut 1 piece of 1×3 and drill a hole in the center. Insert a bolt, washer and wing nut. Slide the assembly onto the t-track.
Cut 1 piece of 1×2 and drill two pocket holes on one end. Place on the wing table and center on the back of the stop. Clamp in position, flip over and attach using pocket screws.
I sanded a bevel on the bottom edge of the stop. This will prevent sawdust from building up in front of the stop.
Final Thoughts
A mobile miter saw stand increases your work area, has smart features to save time and improve accuracy. It’s portable and saves space in a small workshop, garage or shed.
Get the free plan (including the detailed instructions and measurements) now!
Thank you for stopping by. If you found this information helpful, would you please pin it to Pinterest? Other DIYers would appreciate it and I would too! Thank you – Scott
Recommended For You
Pin This For Later
I built this and found it to be a vast improvement over my old one. Thanks for the plan!
You’re welcome, John. Glad you enjoyed the plan!
I wish you would update the plan by adding slotted holes to make the arms adjustable. I did and it works really well
Thank you for sharing, Sean. Sounds like a great upgrade.
Scott, dude, this is exactly wha I’ve been looking for! Your plans and instructions are super easy to follow and totally thorough, I can’t thank you enough for posting. You posts about organizing you workshop and the process you followed is exceptional! Let me know if yours available for professional consultations on client projects.
You’re welcome and thank you for the compliments. I’m glad you enjoyed the plans!
I built this and it’s working out great for me! I did forget to drill my pocket holes on opposing sides for some of the brackets but since it’s a shop tool, I’m not too concerned with it. This was also a great learning project for me. Thank you so much for the plans!