How to cut a countertop for a sink with a wing
What to saw the worktop for the kitchen?
The furniture industry offers a wide range of products to choose from, including kitchen sets. Their variety is impressive and you can choose any, based on preferences and financial capabilities. But in most cases, the sink is sold separately and installed by the purchaser himself. Therefore, you need to know certain rules and tricks for carrying out such a procedure, as well as have a certain set of tools.
To make the right choice, you need to have information, which countertops for the kitchen produce. Options abound: for every taste and wallet. There are simply functional, and there are those that become a decoration of the kitchen. The main criteria for selection are:
- Aesthetic and appearance;
- water resistance and moisture resistance;
- Resistance to mechanical damage;
- Compliance with the requirements of hygiene;
- environmental friendliness;
- The durability of the coating;
- Resistance to external factors.
The main and most common materials for countertops are:
| Material name | Pros | Cons |
| Plastic | Reasonable price, resistant to temperature differences, easy to look after, many types | Looks cheap, moisture can cause delamination or swelling, toxicity is possible |
| Wood | Good appearance, environmental friendliness, the ability to give the countertop any shape, easy to update | High cost, the need for careful attitude, periodic restoration of the original appearance |
| Tile | Budget option, good appearance, heat resistance, long service life, easy care, environmentally friendly | Difficult to care for seams, afraid of heavy objects |
| Quartz | Easy to care for, not afraid of mechanical damage, resistance to temperature extremes, hygienic and environmentally friendly, the use of abrasives and detergents for its cleaning, design appeal | Difficult to install |
| Granite | Beauty, resistance to high temperatures, not afraid of mechanical damage | Imperfect moisture resistance, so there is a need for treatment with water repellents, high weight, difficulty in transportation and installation, high cost |
| Marble | Hypoallergenic, unique, durable | High cost, not resistant to temperature changes, possibility to absorb liquid compositions (tea, coffee, juices, etc.).д.), which subsequently leaves stains on the surface, is afraid of the acid environment |
| Glass | Does not fear the temperature differences, no need for special care, hygienic, variety of colors and textures | Expensive, afraid of mechanical damage |
| Concrete | Uniqueness, durability, strength, the possibility of creating a variety of forms and configurations, a variety of colors, | Requires constant care and restoration |
| Fiberboard | Low cost, variety of shades and drawings, exclusivity is possible | Fears temperature fluctuations and mechanical impact, the presence of moisture can serve to swell the joints |
| Particle board | Low price, hygienic, easy to clean | The seams are susceptible to swelling in high humidity, can pose a health hazard |
| Stainless steel | Durability, hygiene, restorability, moisture resistance, long service life, resistance to temperature changes, looks great in a modern design, the availability of matte or glossy surface, the presence of textured decoration | High cost |
Watch the video on how to insert the sink into the countertop
This is quite a responsible stage. Position the sink in the center of the worktop. Remember that the distance from the edge of the countertop to the edge of the sink must be more than 50 mm. If this distance is less than 50 cm, the sink must be deepened.
The distance from the corner plinth should be more than 30 mm in order not to create problems during cleaning. If the dimensions of the countertop allow, it is better to leave some space from both sides for the household cleaner and the sponge.
If the manufacturer encloses a template for mortise sink, then the task is much simpler. The template is glued to the worktop and makes marking easier.
If the worktop does not have a template, place the sink on top of it upside down and trace the contours with a washable marker. If both the sink and the drying compartment or waste tray are in the same unit, one common hole is cut.
How to properly make a hole for the sink?
To make a hole in the countertop, you will need an electric jigsaw. It is suitable for worktops made of wood and chipboard. If the countertop is made of durable materials, the jigsaw will not do the job. First, prepare 4 holes with a diameter of 1 cm in the corners of the rectangle, without crossing the line for the trimmer marking. Then a jigsaw is put on the jigsaw with the necessary length of the tooth (2 mm). To avoid chipping on the front surface, choose the opposite direction of the tooth.
The holes are made on the left and right, and then the wooden bar is tightened with self-tapping screws across the kerfed lines, so that the cut part will not fall off prematurely under the force of gravity. The cut out part is removed accurately and the bare edges of the hole and irregularities are covered with liquid silicone.
Features of the connection of communication
The next action will be the attachment of the fixture to the countertop for the subsequent process of installing faucets and hoses. The siphon for convenience is fixed to the already installed sink.
Included with the sink should be specialized hinges for the screw clamp, they will be in the shape of the legs. With their help, you can much more tightly and reliably tighten the edges of the structure to the tabletop. Do not tighten the fastening devices with screws with great force. If you overdo it, the rims of the sink may bend upwards.
The place for the cutout is chosen taking into account the minimum distance for water drainage to the sewer and water supply connection.
Installation of a stone sink
After reading the detailed instructions, the question will no longer arise: how to cut the countertop under the sink. The work goes quickly and without problems.
Example of installation without cardboard template
If for whatever reason you don’t have such a template, don’t get upset. The procedure itself in this case, too, is nothing complicated, and a brief instruction on installation is given in the table below.
Table. Master class on how to install the kitchen sink into the countertop.
| Steps, photo | Description of steps |
| Step 1 | Having chosen a suitable place, you need to turn the sink upside down with the bottom and put it on the countertop where the product will be located. The position of the sink is aligned, for which a tape measure is used. |
| Step 2 | When installing the sink, do not forget about the overhangs of the countertop, as well as the connections of the kitchen drawer. For this reason, the sink should be positioned so that the fasteners do not rest against the connection of the lower cabinet, and the product itself does not protrude beyond its front surface. |
| Step 3 | Next, you need to outline the contour of the sink. |
| Step 4 | Measuring the rims. The width of the mortise opening will be smaller than that of the sink. In most cases, these sides have a width of 1.4 cm, but it is advisable to check. |
| Step 5 | Dimensions need to be transferred to the countertop, and then mark the line for the trimmer cut. |
| Step 6 | Next, you need to take a drill with a diameter of 0.8-1 cm and use it to make through holes in the corners of the contour. The last, as in the previous instructions, will be needed in order to wind the jigsaw jigsaw. |
| Step 7 | In one of the holes should be inserted a jigsaw saw, and then cut according to the marking of the opening. |
| Step 8 | The opening is almost ready. |
| Step 9 | Now carefully remove the hollowed out piece of countertop. |
| Step 10 | It is necessary to smear the silicone on the edges of the opening. If you do not have a special tool that can squeeze the silicone from the tube, you can use the handle of a simple hammer for this. |
| Step 11 | So, the edges are smeared with silicone. |
| Step 12 | Next, we need to prepare the sealant and fasteners (all of these should also be included in the kit). |
| Step 13 | The fasteners should be installed, but it is recommended to degrease the rims before gluing the sealant (for example, with solvent “646”). |
| Step 14 | The curbs should then be sealed with sealant. |
| Step 15 | The next step is to install the sink with all its fixtures in place. Before tightening the fasteners, you should once again check the position of the product and, if necessary, align it. |
| Step 16 | At the end of the fasteners must be tightened. |
| Step 17 | All, the sink is safely installed. Now all that’s left is to screw on the faucet, hang the drain and connect the pipes, but all this has already been described in detail in the previous section of this article. |
When buying, you need to pay attention to the features and characteristics of the sealant: shrinkage, adhesion, purpose.
The product is applied to a dry cleaned surface, so that there was maximum adhesion. If you do not fully prepare surfaces for sealing, it is possible penetration of moisture in the cracks, which is fraught with the growth of fungus and mold.
Usually uses an elastic silicone sealing material. It is easy to use and reliable enough.
Sink installation video. Inserting the sink into the countertop.
The washing machine is most accustomed to see the bathroom. However, not every layout allows you to allocate space for this device in the bathroom. With a competent approach to the matter, the washing machine will successfully fit.
Many housewives, choosing furniture for the kitchen, look primarily at its appearance. However, the design should be a secondary issue. The most important is the material from which the kitchen set is made.
Install a recessed dishwasher in the cabinet is quite possible without. If the owner does not know how to build a dishwasher in an ordinary kitchen cabinet and wants to carry out the installation for the first time.
The kitchen in Russia is not just an auxiliary room equipped with appliances, not just a dining area. It is a hearth in the house, where comfort and coziness reign, a place of communication, which disposes to frankness. О.
Wood is a great material for furniture: strong, aesthetic and durable. Made of it products are elegant and practical, and if they are made with their own hands, then.
Unfortunately, the reality of life of the average Russian is that the kitchen in most homes, and even more so in apartments, are of modest size. They are more or less able to meet the needs of.
How to cut a tabletop for a sink?
Most often the question of how to cut a hole under the sink in the countertop is asked by owners of laminate board, because in this case it is easiest to make a kerf. But it is necessary to take into account the subtleties:
- to work on the marking is a repetition of what has been passed (important information);
- Saw with an electric jigsaw, inserting it into the prepared drill holes;
- To lead the jigsaw blade perpendicularly to the sawed surface, pressing the tool tightly;
- sawing worktops should be done from the laminate side to avoid chipping and cracking;
- be sure to support the sawed-out part, because it may break off under its own weight and form a crack in the board.
TIP: do not be lazy and as you move along the sawing line, stop and tape on both sides (outside and inside) the place of sawing, so that the sawed part of the countertop will hold firmly to the last millimeter.
And how to cut a tabletop for a round sink? Likewise, with the jigsaw, take your time, passing the blade along the line of the marking, gluing the kerf with scotch tape.
Place the sink in the hole that is formed. Fitting? The sink must fit in freely. If it’s tight. use a rasp and sandpaper. Clean the resulting cut from sawdust, and cover with a thin layer of sealant.
And how to cut the countertop under the sink if the product material is artificial stone?
In this case, you can use a metal drill as a tool for drilling holes, and make the cut with a mill. Or you can use the same jigsaw, but then make the cut with an indent from the marking line by a centimeter, and then the cutter to bring the saw trimmer line to the desired size. These precautions are necessary to avoid cracking and chipping.
When the hole is sawed, processed, fitting the sink went perfectly, move on to install the sink and connect the plumbing.
Is it possible to cut a sink hole in a glass or natural stone countertop by yourself??
Theoretically, of course, you can. But there is a counter question, whether it is worth the trouble, especially taking into account the high cost of the material to be cut?
For glass and natural stone with an ordinary jigsaw and milling machine can not do, you need special equipment, which is also not cheap, but you need only once. In addition, you will need to prepare a specially equipped place where to cut, because both glass and stone are heavy, they need strong supporting supports.
The professionals at E-stoun know how to properly cut a countertop for a glass or natural stone sink.The most important thing is to choose a sink with a lot of experience and skills. They can be trusted to work on the kitchen of your dreams.
The choice of sink and preparatory measures
It is not necessary to understand step by step how to perform the installation. There is also no need to know the exact dimensions. You can probably do without the jigsaw.
But all this will be possible if you ask for help from specialists who will take care of all these matters. But this service is not the cheapest, and the price of installation sometimes exceeds the cost of the sink itself. So you can draw your own conclusions. But you will surely have to choose the product yourself. Experts and experienced masters at home advise to choose a sink (sink) deep enough and not very high matching faucet. Still, the faucet also plays a role in this case.
A deep sink lets you avoid splashing water, and dirty water, when you’re washing up. Plus, the deep product gives the possibility to stack quite a large number of dishes.
Not the least of these is the material used.
The sinks made of stainless steel are rightly considered to be the easiest to install. The alternative is enameled steel, but its durability is lower.
To install the sink itself, cut a hole for the mixer, fix it on the countertop under the wood. made of fiberboard or other materials, you will need to prepare a certain set of tools and materials.
- Jigsaw. Preferably electric. And buy several interchangeable attachments at once, as beginners often encounter their breakage due to insecure movements;
- Self-tapping screws, screwdrivers, or screwdrivers. The actual fasteners and tools for tightening them;
- Fasteners. Most often mounts for sinks and basins come with. Make sure of this when buying;
- Sealant. Be sure to be moisture-resistant, to withstand the further load of water and moisture.
Sealant treatment is made on the entire perimeter of the landing place. In this way you will ensure effective waterproofing.
If the countertop is made of particleboard or fiberboard, then it is doubly important to use a sealant.
sink variations
Using the video and photo instructions, you can without much trouble yourself and absolutely correctly perform mortise or installation.
But prescribed step by step instructions can be oriented to the specific products that need to be fixed to the countertop. The chosen method of installation depends directly on the sink you purchased.
- Overhead. The most budget-friendly and easy to install. It is put on a separate moisture-resistant cabinet. The disadvantage here is that there will be a gap between the sink and the countertop;
- Inset. Mounted into the kitchen or bathroom countertop itself. Here you will need to cut a precise and accurate hole;
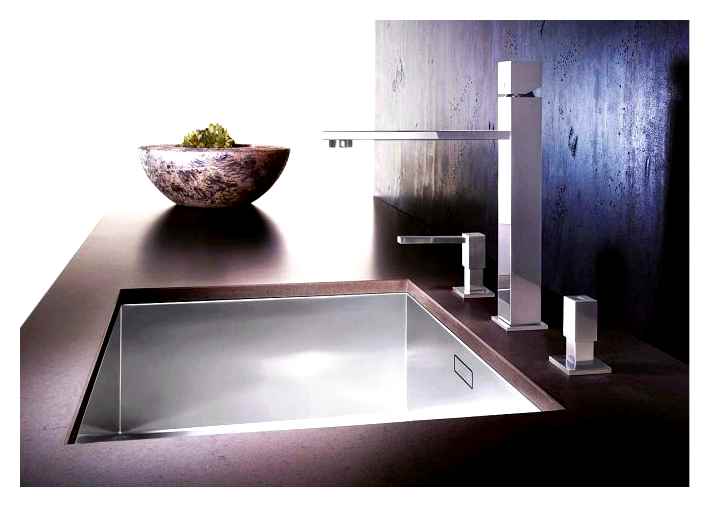
- Tabletop. This is the more expensive segment. Installation is carried out slightly below the edge of the countertop. This allows for excellent sealing, and the appearance is more original.
Now separately tell about how to fix one or another variant of the sink.
By the way, you can ask local craftsmen the question of how much it costs to install the sink. After the price has been announced, many will probably return to the idea of doing everything themselves.
Work with overhead sinks
As noted by experts and craftsmen at home, it is easiest to install an overhead sink or a built-in sink. The most common models are made of stainless steel.
Installation requires a separate module, which will completely overlap the sink. Here installation is extremely simple and straightforward. To fix the product, you need to use special fasteners that are L-shaped and have a slash. On average, 4-5 of these fasteners are needed for one sink. And in the case of such a sink, first you connect the faucet, and only then install the structure itself to the cabinet.
You can do it in another order, but then you may have problems with connection. You won’t be able to work with them.
To perform gluing of the overhead countertop will not be very difficult even for the novice home handyman.
Here it is only important to follow the instructions and to act in the right sequence.
Installation instructions can be presented as follows.
- L-shaped fasteners are attached to the inner sides of the drawer unit;
- Marking under the fasteners is applied;
- Screw the self-tapping screws;
- the end part of the drawer is covered with sealant;
- the sink is installed on the module;
- A complete fit is achieved;
- fasteners are fixed;
- superfluous sealant is removed;
- the connection to the utility lines is made.
As you can see, there is nothing complicated. And so novice craftsmen usually perform such a task themselves.
The situation is somewhat different with sinks with recessed sinks.
Inset sinks installation
If the option of an overhead sink is not suitable for you, this is quite normal. Yes, it is easier to mount them, but from the position of tightness and appearance mortise counterparts are much superior to them.
No extra complex work is required for the basin embedding. The most important step is to cut the hole.
Installation is carried out according to the following guide:
- On the countertop is determined the optimal place for installation;
- The marks for the shape of the wash basin are made;
- To mark it, turn the sink upside down and trace around the contour;
- for complex-shaped sinks from the manufacturer there is a template for the cut-out;
- at least 7 cm from the edge of the countertop, the jigsaw is used to cut out the hole;
- From the line of marking you should step back about 18 mm to leave room under the support for the sides;
- the hole is machined;
- A layer of sealant is applied around the perimeter;
- The sink is pressed on with the help of clamps, which are usually included in the set;
- Remains of the sealant are removed;
- utilities are connected.
Here everything looks a bit more complicated. Besides the jigsaw, you will need an electric drill to make a start hole under the jigsaw of the jigsaw.
If you have a fairly thin countertop. Make sure that it can support the weight of the sink itself under the load of water and dishes.
Underbench models
The peculiarity of such sinks is that they are installed at the same level or slightly below the level of the countertop itself.
To cope with such a task yourself will be difficult, because the process is time-consuming and requires solid experience. You actually have to remove the bead layer. This option is relevant for sinks made of artificial stone, natural material, steel. Sometimes you cannot do without a diamond saw.
In this situation, it is really wise to seek professional help.
By the way, try not to screw in self-tapping power tools, because with too much force you can damage both the sink and the countertop itself. I strongly recommend replacing the rubber seals, which often come with sinks, with a quality sealant. Sealant can not provide a good seal, plus its life is several times shorter compared to sealant.
If you still have questions or want to supplement the material, write in the Комментарии и мнения владельцев.
Subscribe, tell your friends about our project, leave feedback and look forward to many more!
Mounting a sink integrated into a worktop
Integrated kitchen sink creates a single composition with the kitchen countertop and requires skill to work with tools, so the expensive option is better to trust professionals
These appliances form a single unit with the worktop and sink. They have higher demands. These appliances are thicker than usual, and their service life is longer. In the same way as for the previous types of sinks, make a hole in the cabinet, precisely measuring. You can order templates for installation of any sinks. So, we make a marking of the future hole, cut it. The sharp edges are removed with a router. Then the roundings are ground by hand. Apply polymer glue. After applying the resin, install the sink. cure and leave it to set for 12 hours. Finally, the sink is additionally fixed by pouring a quick-curing resin on its underside. It is important that the sealing mass is applied to the side walls only. Then waterproof it with adhesive or aluminum tape. Remove excess adhesive after the grouting has hardened. Connect the water and the drain.
Fit the trap and washbasin mixer
Scheme of assembly of the sink with a siphon into the sewer outlet
Siphons have two main parts: the main part, the small part. They are assembled together. A plastic nut is inserted into the small part. The rubber seal is inserted under the nut. The small part is inserted into the large part. The nut is screwed in as far as it will go. But even if you tighten the nut, most of it will move a little. It is necessary so that we can place the corrugation in a comfortable position. Into the tube that is on the large part. Next to the one in which we screwed the small part. In the second nut we put the rubber seal. In this tube we screw the second part of the siphon, which will be attached to the bottom of the sink and countertop. Screw the nut all the way in, so that the rubber gasket is well pressed. Screw the cover into the trap. In case of a blockage you can unscrew the stopper cap and put it back on. It is easier to install the siphon before installing the sink, not vice versa. Screw the screw into the siphon until a characteristic squeak is heard. Do not twist the faucet. Now we have to install the siphon. To do this we put the nut first, insert the rubber seal, put it into the siphon and screw it all the way in. Now you can connect to the drain from the countertop.
It is important to choose the right faucet for the countertop. First, you need to decide how you want to turn on the water. Turn the crane or raise and lower the lever. Everyone can choose a suitable design for themselves. It is worth remembering that the low price and fancy design is an omen of low-quality production. It is better to buy a simple European faucet. When buying it, you should consider the quality of water and the presence of a gas boiler in the house. The of faucets range from the lowest to the highest. It all depends on the quality. So begin the installation. Turn off the hot and cold water taps. Screw the ribbon on the threaded connections. Apply sanitary paste on the tape. After that, we screw in the water outlets.
You can use silicone sealant. This is done to protect the linen from rotting. We connect flexible hoses to the faucet. There are two of them. Put the ring gasket on the base of the faucet. It must be in the groove designed for it, otherwise the water will leak. We screw in the threaded pins. There may be one or two of them in the mixer kit. Letting the flexible hoses through the sink mounting hole. Check that the O-ring is not displaced. Lock the faucet from underneath. Put on the rubber seal. Tighten the nuts on top of the gasket firmly with a wrench. The tap must not move. Connect the water inlet hose to the water inlets. It is important that the hoses are not kinked or twisted during assembly. After all these steps check the function of the new equipment. Open the water and check whether there are no leaks.