How to install the tillers correctly on a power tiller
Useful hints
In order to optimize the load and increase the service life of cultivator, loosening width can be selected by changing the number of hinged tillers.
Adjustable depth adjustment is possible with the depth guidance of the opener blade. It does all the work, no force is needed on the single axle tractor. The handlebar is pressed lightly on the ground, the opener enters the soil more easily and brakes the machine, increasing the cultivation depth.

The machine is swung out slightly so that the gearbox does not sink into the uncultivated soil.
When operating the cultivator, the user must keep a straight back and hands at waist level. This body position contributes to a longer service life of the unit and will not harm health.
If the blades get blunt after long use, they must be sharpened with an angle grinder. Self-sharpening blades for easy maintenance. The type of soil has a great influence on the cutting edges. Cutters wear out quicker in wet or heavy soil.
For more comfortable work and high-quality cultivation of the ground, the rotational speed of the tiller for a cantilever motoblock should reach 275 rpm, the cultivator. 140 rpm.
If the mechanized equipment does not work well with the tiller, it is necessary to find out the cause of the malfunction and eliminate it in time. If it is impossible to carry out repairs, ask for help from specialists.

How to correctly assemble tillers for your power tiller and whether it is necessary to sharpen them
The tiller for the power tiller is one of the main components. With its help, the cultivator performs its main functions: loosening the soil and getting rid of weeds. This part consists of a rotating axle with blades attached to it. Usually such accessories come with the machine, but many recommend buying or making several additional tillers for the power tiller yourself. This will make it possible to vary the depth of ploughing and the width of the cultivated surface.
Milling soil in the spring
Agrotechnics with the use of power tillers involves loosening the entire soil horizon to a depth with an active tiller. At the same time achieve the following results:
- The soil is broken down to its optimum size. It is found that clod sizes of 816 mm contribute to better root coverage. Plants form a powerful root system, which contributes to the effective use of nutrients from the soil for stem growth and crop formation;
- Tool rods uproot roots of perennial weeds from the layer: birch weed; couch grass; nettle; cloverleaf; chicken millet;
- A considerable amount of air penetrates into the soil layer by repeated penetration of the cutting plates. Decomposition processes inside the cultivated soil are intensified.
How to assemble correctly cutters on a single axle tractor
A single-axle tractor is a truly universal machine, which is an excellent assistant for a farmer whose farm size has not yet reached the size that would make it necessary to buy a tractor. In addition, the single-axle tractor is much more compact. Depending on the attachment it can replace many separate units, saving the owner a lot of money. The tiller is one of the most important types of “attachment. Therefore, many owners puzzle over how to assemble the cutters on a single-axle tractor and how difficult it is to do on their own.
Which one is better?
Cutters for a power tiller are selected for each type of work and depending on the soil structure. Sabre-shaped cutters, loosening the soil to a depth of up to 35 cm, bring the weeds to the surface. They do not cut them into small pieces, but wind them up and roll them. What keeps them from multiplying. In addition, a coarser “fine-grained” soil is produced. But on heavy and virgin soils, sabre knives have trouble penetrating the ground. Large and climbing weeds quickly wrap themselves around the working area and slow cultivation.
Goosefoot cutters are excellent at dealing with difficult soils and all kinds of weeds. However, because they cut them into pieces with a sharp edge, the weeds multiply. There is the option of combined use. You should go over the plot with these cutters in the fall, and work with sabre cutters in the spring and during the season.
Walking Tractor / Power Tiller Chassis Assembling
The power tillers have long been at the forefront of farming, boasting fast tillage and automatic harvesting. Each model, regardless of country of manufacturer, includes additional power units. As a rule, they are quite enough for quality work on any plots, and there is almost no need to make milling cutters for a power tiller by yourself. But there are situations when the capabilities of a purchased unit do not correspond to the Russian realities.
A simple example: not all Western manufacturers take into account the depth of soil in other countries, specific crops, weather conditions and other things that can complicate the work process and increase the likelihood of a quick breakdown.
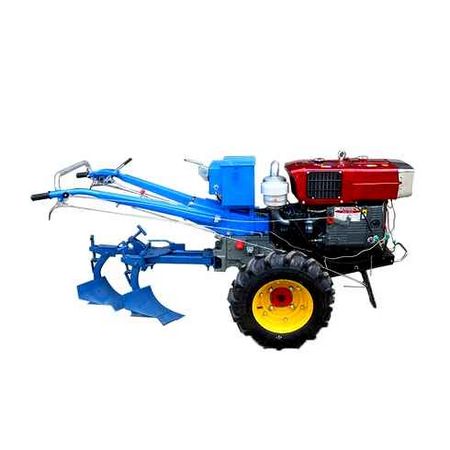
In such cases, you can always buy an additional cutter for your specific area or make it with your own hands. It is worth noting that in many cases homemade parts work much more efficiently than factory-made parts! Visually any tiller looks as follows: two parts of the module with a special set of tillage blades are mounted on the wheel base and then adjusted so that one structure does not interfere with the other. Thanks to this simple technology, the single-axle tractor is able to move independently on the territory and engage in tillage.
It is worth noting that there is a second type of mounted milling machines, working with the PTO. Such units are attached to the back of the main structure, and are often found on such models as MTZ, Prorab, Agro and others. Despite the difference in installation, all types of tillers are made according to the same scheme.
Depending on the type of operation, additional devices may differ slightly from each other. The main purpose of milling machines is to destroy weeds and level the ground surface of the plot, but they can also perform other tasks in parallel. For example, to wrap fertilizers, process the soil or even fertilize it with special devices. Let’s take a closer look at what types of cutters are most common.
What to do if the cultivator gets buried?
If the cultivator is buried in the soil, the operator should take a number of measures.
- Remove outer cutting blades from milling machines. this helps reduce the weight of the machine. Another way is to improve the balance of the machine by installing any small weight at the rear of the machine. It is very important to secure the counterweight securely or it will fall due to engine vibration;
- To pull the machine quickly out of the ground switch the machine into reverse. If it is not provided in the design, the technique will have to pull out of the ground on its own;
- The operator must adjust the position of the cutters correctly when working. Their cutting blades must always point straight in the direction of the machine’s travel.
In order to prevent the cultivator from getting bogged down, the transmission must be inspected carefully before work. This weight should be in good condition and not damaged;. This machine should not be used if there is any sign of wear or tear on the machine. Do not use the cultivator if it randomly switches speeds.
If the farmer noticed this breakdown, it will be necessary to inspect the transmission gears. Shifting forward or backward on its own is a sign that the gear teeth of other machines are jammed. To eliminate malfunctions it is necessary to adjust the clearance between the channels and the transmission gears.
In order to create a cutter to the tiller with your own hands, it is necessary to stock up on such tools and blanks:
- metal tube (no more than 42 mm in diameter);
- blanks for the cutter’s cutting elements (any unnecessary spare parts or pieces of metal will do. For example, you can use old car springs);
- welding;
- angle grinder.
The cutting elements are adjusted to the right dimensions and resharpened if necessary. Then they need to be welded to the tube in the appropriate order.
Specialists recommend not making cutters with a diameter of more than 50 cm, as this will reduce the risk of its breakage during operation. Below is a detailed drawing for making a gooseneck cutter:
When using gooseneck milling cutters, also keep in mind the safety precautions and rules of operation of the product. Power tillers should be above the ground before starting and plunge slowly and smoothly into the soil.
Cultivator shares assembly process
There are two forms of blades:
- Sharpened. “Petals” easily enter the soil without adhering to the surface. This reduces the strain on the engine and the fuel consumption. But sharp blades can not completely remove weeds, they soon sprout again. Such canopies must be handled carefully so as not to damage the plants and for your own safety;
- With a semi-circle edge. They are characterized by safety in operation. But when ripping, there is more resistance, tillers get stuck more often. Such cultivator blades handle weeds more effectively.
There are two ways to attach the “petals”:
- On rivets. The element is indestructible. In this case, it is not very convenient to store and transport the device;
- Bolted. The part can be dismantled.
To assemble a tiller on a power tiller, it is important to observe the direction. the sharpened part of the “petal” must be placed in the direction of travel of the machine.
the number of sections equals the number of attachment plates: if they are all the same, only three elements can be installed. If they will move, four or six sections must be fastened. The blades must be pre-marked.
How the tiller is assembled?
- When installing the three-blade cutter, the first blade is fixed to the plate. the bolt does not need to be fully tightened at first. The two remaining knives are mounted on the opposite side of the plate;
- Left and right blades are mounted on a four-blade and a six-blade burr, alternately. It is worth dividing the “petals” into right and left sections in advance;
- If necessary, an additional section is mounted with a pin;
- The structure is bolted down as rigidly as possible;
- At the end of the shaft a protective disk is fastened to protect the plants from damage.