How to weld a band saw at home
Repeated stripping
Visible beads may form on the web during annealing. They need to be removed by performing a second stripping. Now it is needed not for technical, but for aesthetic purposes. At the same time, you can correct the cavities between the teeth, giving them the correct geometric shape. Re-sanding can be done with any abrasive tool. Treat the metal so that the joints are almost invisible.
Welding
Welding for band saws starts with turning on the machine. The band saw welding machine is started depending on the model. It can be a separate button or a special handle. After starting, a welding current will be supplied to the ends of the saw, which will melt the metal in the area of the future seam. The saw is supplied with current through the clamps. After the joint is heated, the movable clamp must be slightly displaced to form a weld bead. The seam is ready!

Make sure the surface of the electrodes is clean before welding. It is not necessary to clean all the electrodes, only the part that contacts the saw blade is sufficient. If you ignore this rule, the connection will turn out to be of poor quality. Contamination will disrupt the resistance of the circuit.
Installing the saw into the clamps
Above, we could already familiarize ourselves with the components that make up a band saw welding machine. We said that there is a clamping mechanism. It is in it that the saw blade must be installed. The clamp has a movable and a fixed part. Set one end of the blade to the movable one and the other end to the stationary one. There is free space between the clamps. You need to install the canvas so that its joints are exactly in the middle of this space. Naturally, the joint must be smooth and precise.
Preparing the canvas
To make the ends to be connected even, the blade is cut with a guillotine. In its absence, you can use an angle grinder or chisel. When re-welding at the place of the destroyed old seam, 5 mm are cut off at the ends. the cutting line must be strictly between the teeth. At both ends, leave a draft allowance of 1.5 mm. With an abrasive tool, irregularities and burrs are removed. After cleaning the ends from dirt, they are degreased with a solution of industrial alcohol or acetone.
How to weld a band saw
Band saws, both for wood and metal, are made from a cutting blade connected in a ring. Since during operation they are subjected to cyclic tensile and bending loads, the joint in terms of strength should ideally not be inferior to the material of the canvas. Therefore, special equipment is used for welding strip plates.
Annealing
The metal in the welded area becomes brittle under the influence of high temperature. To return to its previous properties, it is subjected to annealing using the same butt welding machine for band saws without removing the blade. The settings set the zero stroke value and change the current mode.
After the current is applied, the connection point heats up to 600˚C. The temperature is controlled by the readings of the pyrometer. If it is absent, they are guided by the color of the metal. A cherry red hue is considered normal. The appearance of orange or yellow color means overheating. When the required temperature is reached, the current supply is interrupted. The optimal annealing time is 3. 5 minutes. To prevent rapid cooling of the metal at low ambient temperatures, the current is switched on cyclically for short periods of time.
Depending on the metal, it is sometimes necessary to anneal twice. Combining operations is possible to improve performance. Immediately after welding, current pulses are periodically started to increase the cooling time. After manual welding, annealing is carried out using a furnace and oil.
Soldering
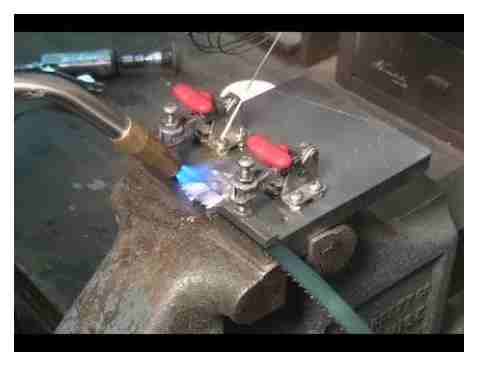
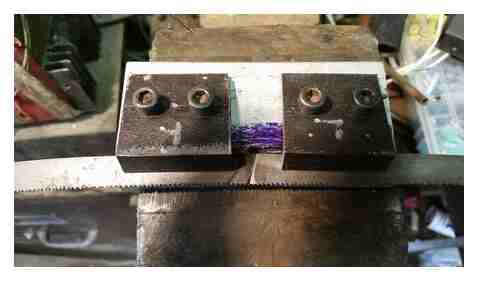
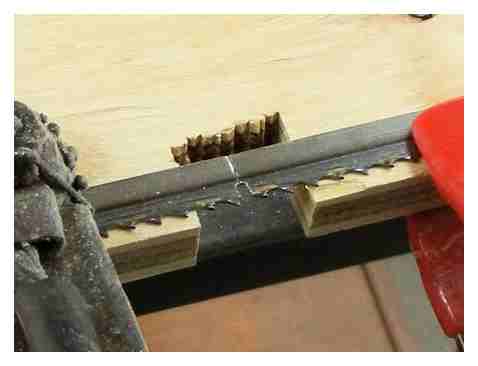
When contact welding is not available, high-temperature silver soldering with a special borax-based paste flux is used. To secure the ends of the web, a simple home-made device is used. Heating by a gas burner.
Soldering is carried out according to the standard procedure. Flux is applied to the beveled ends of the saw. After clamping in the fixture, the junction is heated to the melting temperature of the solder placed next to it. Under the action of capillary forces, it will begin to tighten into the joint. After the solder appears over the entire mowing line of the joint, heating stops. After cooling, the saw is removed and cleaned of sagging.
How to make a plywood band saw with your own hands
A popular option suggests making a band saw with your own hands from plywood:

- The first step is to assemble the frame for the plywood saw. A curbstone is built from the boards, inside which an electric motor is installed. A bar is made of a wooden bar, plywood supports for pulleys are fixed in the upper and lower parts. The curbstone and frame are connected to each other. A hole for a bushing with bearings is sawn in the lower workpiece for the wheel. A textolite tabletop is laid on top of the support, in which a narrow hole for the cutting blade is prepared in advance. It is also recommended to attach a small brush to the side of the structure. It must be installed directly in the direction of movement of the band saw along the pulley in order to automatically remove sawdust during operation.
The plywood construction turns out to be quite strong, despite the fragile appearance - Then they start making plywood pulleys. They are cut out in the form of circles and glued together so that the thickness of the part is at least 3 cm. Three circles are required in total. one with a groove for a belt drive and two more for a belt blade. A circle with a groove for a belt is installed inside the cabinet, the second is mounted at the bottom of the structure, and the third is mounted on top. In the last pulley, a hole is made for a bushing with a bearing and it is fixed with glue and wooden rails.
The wheels must be covered with rubber tubes so that the cutting blade does not jump off. - The upper pulley is movably fixed to the structure so that it allows the saw to be tensioned. For adjustment, a simple lever mechanism is mounted, which is fixed in different positions with bolts. The lower pulleys are placed motionless on the same shaft and a belt is put on the one of the circles, which is to transfer the rotation from the engine to the saw.
Before the test run, the pulleys must be carefully aligned in a vertical plane relative to each other. - The cutting band is installed on the pulleys, along the smooth side of the blade, guides are installed, which will not allow the saw to bend. The easiest way to solve the problem is roller bearings.
To prevent the belt from shifting under load, the bearings must be perfectly aligned - At the final stage, it remains to cover the upper band saw pulley with a cover. It will not hurt to protect the electric motor and the belt-driven wheel from sawdust and dust. Also, you need to bring the start button to the motor, placing it in a convenient place, and to increase safety, install a protective device in the electrical circuit that turns off the device in case of overloads. A container can be placed under the worktop to immediately send sawdust into it during operation.
The cover gives the band saw a neat look and protects the structure from sawdust
A homemade wood band saw with your own hands is ready to use. It only remains to configure it and make sure that the structure is functional. To do this, the saw blade is pulled to the maximum using the upper wheel, it is checked that the edge is perpendicular to the table top, and the guides are removed. The unit is started up and a test cut is made on a small workpiece, being careful not to subject the belt to loads.
If the saw is assembled with your own hands correctly, then the pulleys and the blade should move smoothly, without jerking and vibration. After checking, the guides are put back in place, now it will be possible to apply a load to the belt.
How a band saw works
Band saws may vary in design depending on the model. However, for a home workshop, a vertical blade machine is usually chosen, which consists of the following main parts:
- frame, or frame;
- sawing table;
- drive, or electric motor;
- pulleys;
- saw blade.
How to join a band saw blade yourself, silver solder DIY
The structure is activated when the electric motor is turned on, and the cutting belt begins to move in a closed circular path at high speed.
Saw Band Dimensional Drawings
Before proceeding with the construction of the machine, it is necessary to find the corresponding drawings. They indicate not only the design elements of the band saw, but also the dimensions.
The classic floor saw is about 50 cm wide
Knowing the dimensions of the future band saw helps to pre-select and clear a convenient place for it in the home workshop.

How to make a band saw with your own hands
There are several basic technologies for making a do-it-yourself band saw for home. Which one to choose depends on personal wishes and requirements, all options allow you to make a convenient and reliable machine.
How to make from a bicycle
An old bike, no longer needed for direct use, is perfect for making your own band saw for wood:
- The first step is to make a frame with your own hands. It can be built from an inch of pine, from overlapping layers of boards, from durable plywood sheets. The frame is traditionally made in the shape of the letter C, in the lower part two supports are mounted, connected to the base, and on top there is a seat for a guide mechanism with a wheel.
You can make a frame not only from wood, but also from steel - Next, a movable block for securing the wheel is assembled and installed in the upper part, which will move vertically. He will be responsible for the tension of the band saw blade. The block is a rectangular frame with a holder for the shaft of the upper moving wheel.
The upper pulley must move in a vertical plane - The next step is to install pulleys on the structure. According to the classical scheme, they are made independently, but when using an old bicycle, they take ready-made wheels. They are mounted on the shaft from above and below and are fixed. Next, you need to throw the drive belt onto the upper pulley and balance it. To do this, install bearings as support for the saw blade, fix the wheel so that it rotates with lowering, and make small indentations in the lower part from the rear. Cameras are put on the pulleys, which will protect the structure from slipping off the cutting belt.
The bicycle wheel is a ready-made band saw pulley with a notch around the perimeter - Then it remains only to finally fix the wheels on the saw frame. A washer is put on the shaft and fixed with a bolt. Then the same is done for the lower wheel. The entire structure is aligned with a ruler and put into test work, first with a minimum load.
The pulleys must be in the same plane, otherwise the belt will not be able to move smoothly
A band saw with your own hands for metal or wood is ready, it will not work as smoothly as a purchased one, but it will be able to cut.
Choice of tape
If you wish, you can make a saw blade for a band machine with your own hands from U8 or U10 tool steel. The material must be strong but flexible, with a thickness of 0.4-0.8 mm for cutting hardwood. When you create the blade yourself, you will need to use an angle grinder to cut teeth in the metal, separate them and sharpen them, and then solder the tape into a solid ring with a gas burner and grind the seam.
How to assemble a band saw from a jigsaw with your own hands
Another simple scheme suggests making a mini band saw for wood with your own hands from an electric jigsaw. The algorithm is proposed as follows:
- A jigsaw is applied to a small square workpiece with the handle down and metal corners are fixed on both sides. Using a drill in the marked places, make holes for the screws. The corners are fixed on a wooden stand.
Any solid board or small sheet of chipboard is suitable as a base for a tabletop machine. - A jigsaw is inserted between the corners, slightly raised and a piece of rubber is placed between the edge of the metal elements and the body. Since the tool is not pressed against the board, there is room underneath for adjustments via the buttons. With long screws, the jigsaw is fixed between the corners so that it does not swing and does not play.
Rubber gasket softens possible vibrations during jigsaw operation - Theoretically, the semblance of a band saw can already be used, but it is more convenient to bring the design to perfection and make it look like a classic machine. To do this, a compact tabletop is attached to the base of the jigsaw with screws. Previously, you need to cut a narrow hole in it through which the tape blade of the tool will protrude.
Any solid material is suitable for the countertop. steel, textolite, ebonite
For serious work and cutting logs and large boards, a band saw from a jigsaw with your own hands will not work. But small workpieces with its help will be very convenient to process.
What materials and tools will be required to make a saw
The set of tools and supplies for creating a band saw with your own hands at home may vary depending on the features of the chosen design. But, as a rule, without fail for the construction of the machine tool is required:
TSTC PMT MCHN 1201 HOW TO WELD A SAW BLADE WMV
- boards or sheets of plywood for the frame;
- bearings;
- motor. electric or gasoline;
- metal corners;
- metal cutting blade. homemade or purchased;
- self-tapping screws and bolts with nuts;
- rubber from a bicycle tube;
- wooden bars and slats, they are needed for the supporting frame of the structure;
- bushings;
- belt for transmitting torque;
- a steel bar that will serve as a shaft for the pulleys;
- steel sheet or piece of PCB;
- varnish or paint, they are needed at the final stage of creating the machine.
Also, when making a band saw with your own hands, you will need to use the following tools:

- Angle Grinder;
- screwdriver;
- pliers;
- wrenches. sizes are selected in accordance with the bolts;
- jigsaw;
- screwdrivers;
- hammer.